Overview
Whether the end goal is publishing, editing, or pushing Assets through a workflow stage, many deeper integrations with Frame.io will involve listing out user context and, ultimately, a directory view.
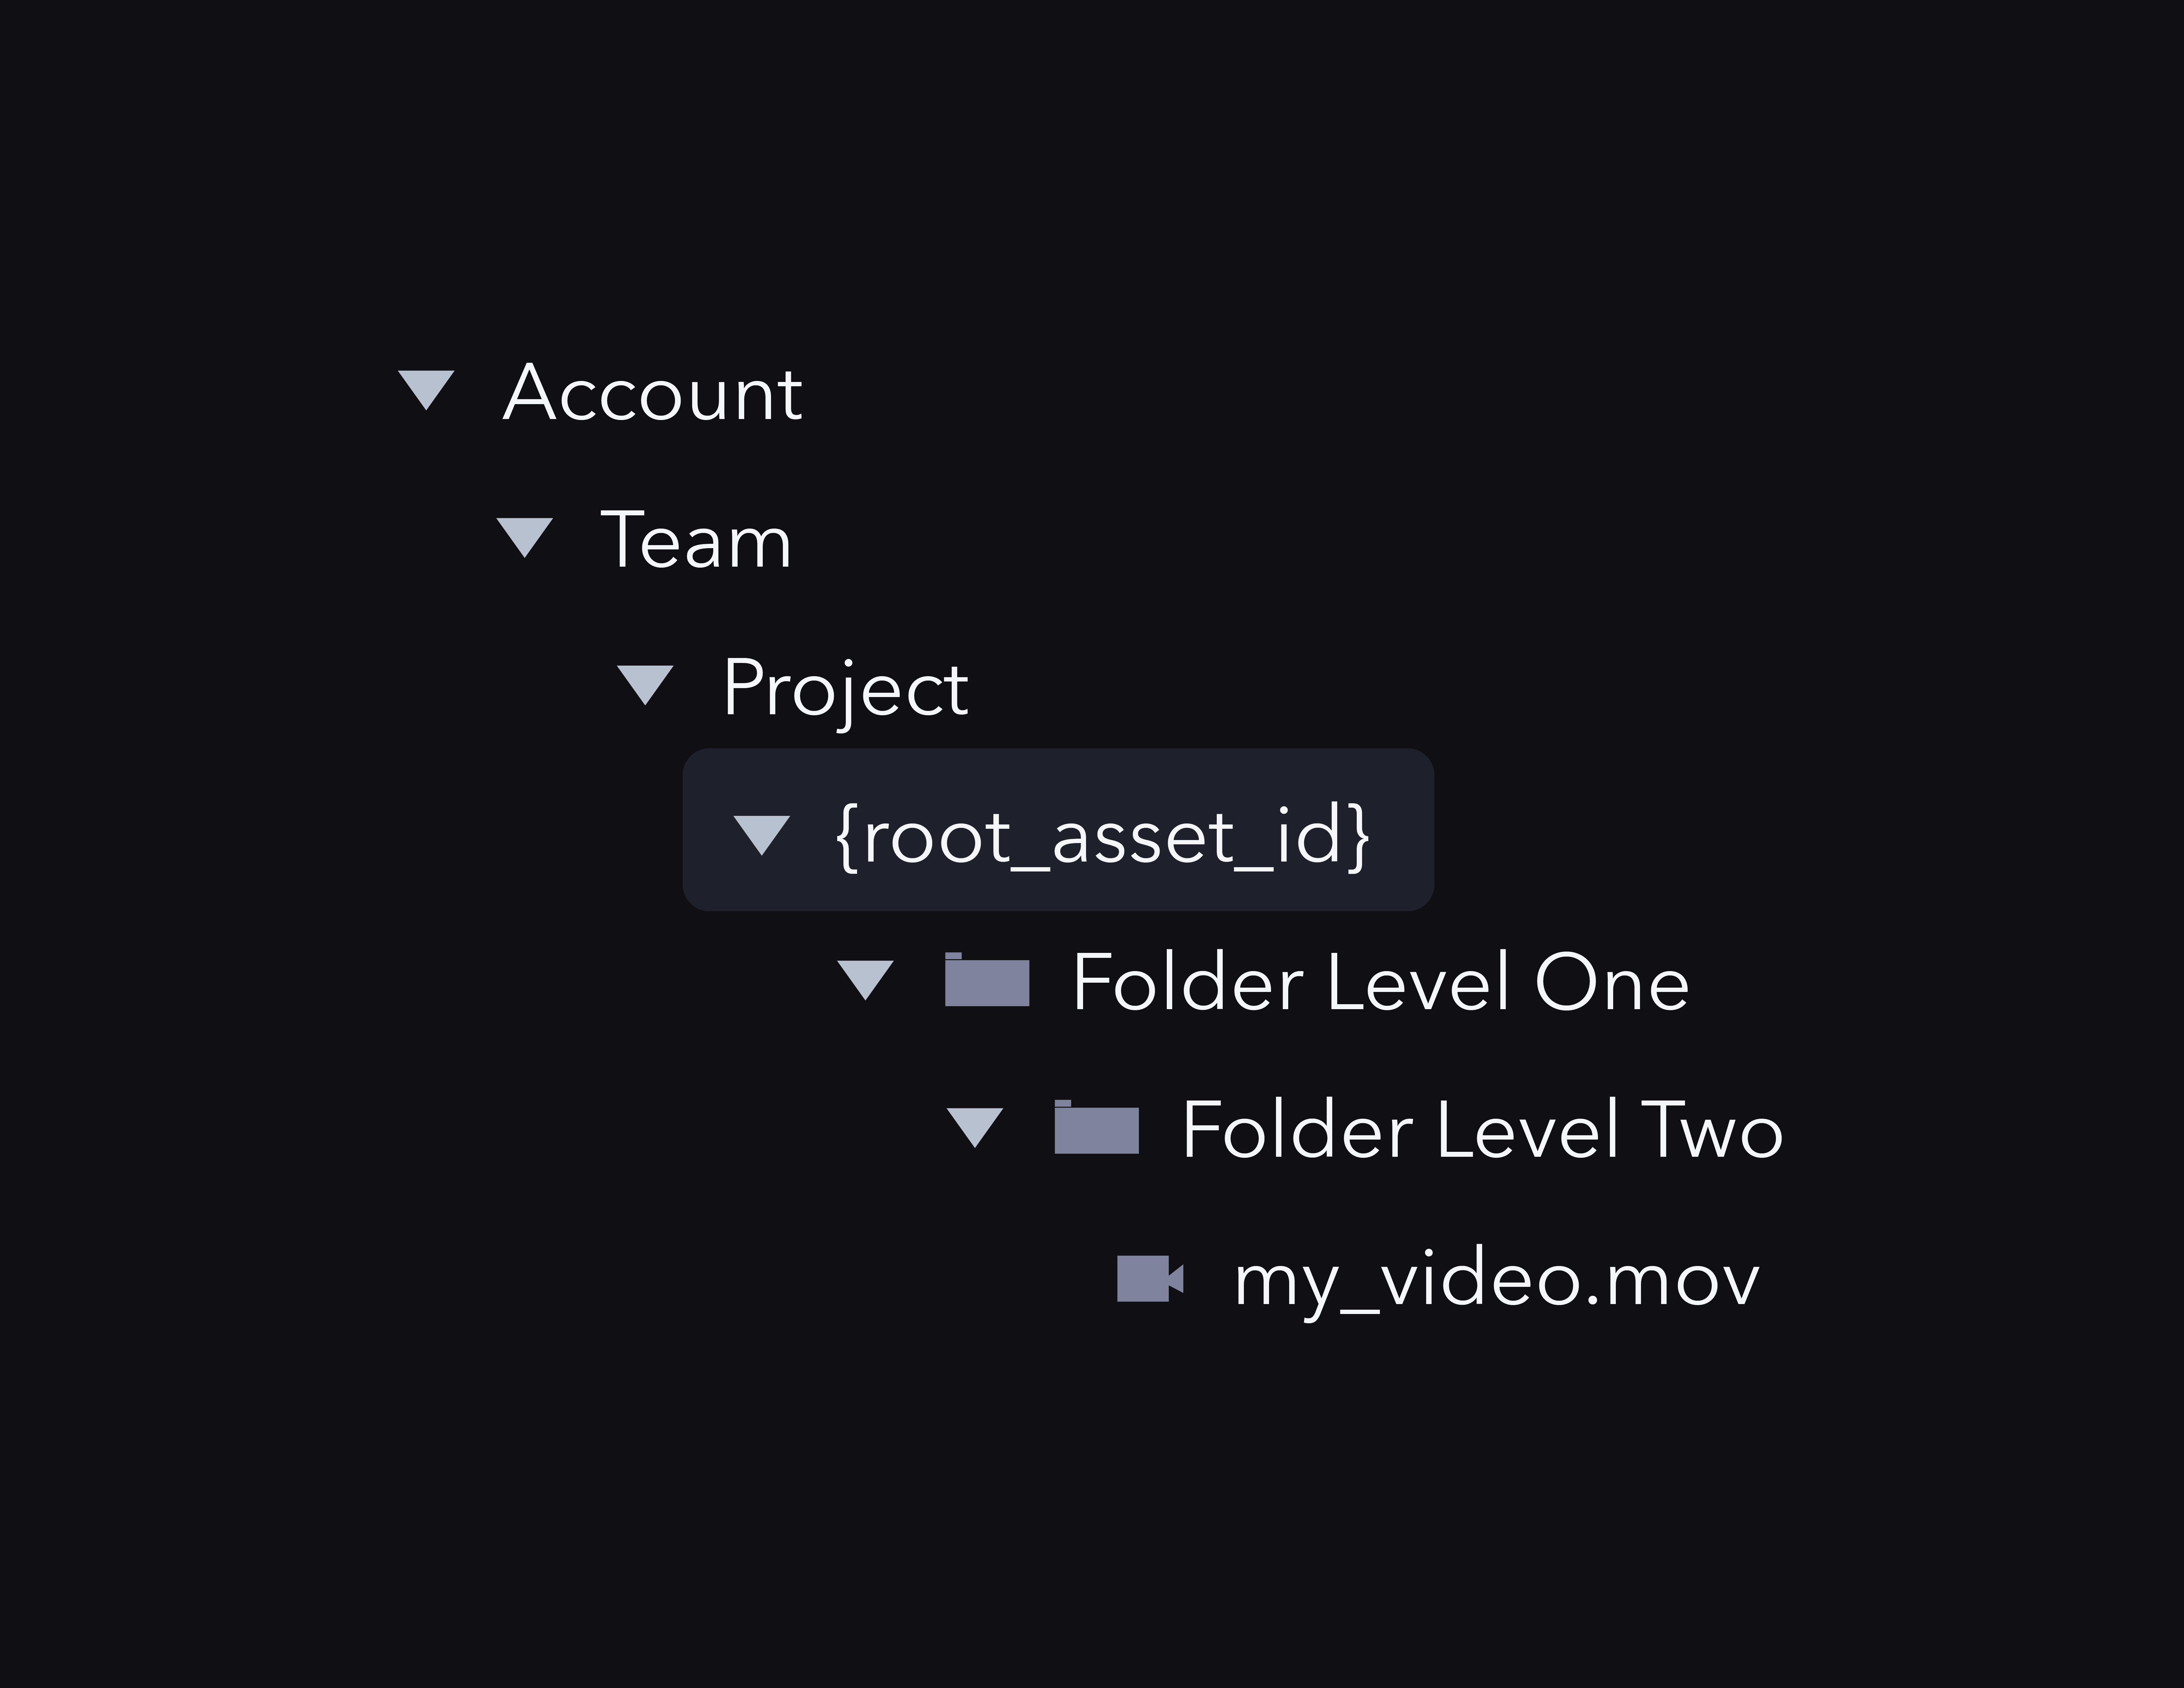
Here's the basic hierarchy of resources (or files) within Frame.io:
Account > Team > Project > Assets
This article explains how to interact with the file tree by making sequential API calls. A common strategy for working with files is to first access a Project, list out Folders, then work with the Assets and Version Stacks contained within.
Important concepts
Every Project has a unique root Asset
RESTful APIs typically describe resources using unique identifiers; the root_asset_id is the unique identifier for your Project's Asset tree. Treat it as a special construct acting as the root node for a Project: the remaining assets stack beneath the root in a downward tree.
 In common workflows, API users need to step down the tree to interact with Assets deeper in the file hierarchy.
Listing a directory
1. Fetch the User’s Accounts
GET https://api.frame.io/v2/accounts
Make the above call with a valid bearer token to get a User’s Accounts. You’ll receive every Account on which the user has Team Member, Team Manager or Admin status. You may also receive Teams for which a user has billing/Admin rights, but no Team access, but this is rare, and will be washed out in the next step.
The payload for the Accounts request is fairly verbose, here's a summary of the important data you may want to grab from the response:
iddisplay_nameowner(email,name)- (optionally)
image
Note: the Account’s image returned by our API will be a pre-signed S3 key, so the URL returned will “die” after about a day. To work around this, you should either re-fetch the image every time your service loads, or ideally, store it locally.
Note that id and owner.email are the only required fields on a user account. If you're displaying users in another app, consider writing conditional logic for presenting user Accounts. Our recommendation is to check, and if not null, display the Account with the following order of preference:
- "
display_name" - "
owner.name's Account" - "
owner.email's Account"
Once your user chooses an Account, you'll probably want to present Teams which requires an additional API request.
2. Fetch Teams within the Account
GET https://api.frame.io/v2/accounts/{{account_id}}/teams
Teams in Frame.io may be “public” (i.e. discoverable to any Team Member in the Account), or “private” (discoverable only to specific Team Members). The API will handle the context for you, so all you need to do is make a valid call specifying the account_id in the above request.
While it’s unlikely a user will exist on more than a few Accounts, Teams are a resource that can balloon quickly. Frame.io's API rate limits are fairly high, but it's always good to check response headers, and if necessary, paginate.
You can find more info on pagination by reading Pagination and Errors.
From each Team, grab the following attributes:
idname- (optionally)
team_image
When a Team is selected, you’ll want to display its constituent Projects.
Note: if you wish, you may also GET https://api.frame.io/v2/teams for a user, and our API will return every Team a user belongs to, regardless of Account context. While this technically works, you run the risk of losing your context unless you take another step to:
- Reestablish context by reflecting the Account name next to each Team
- Allowing your user to search the text of the list
If you're listing shared Projects from the Account level down, you'll want to make an additional call to GET https://api.frame.io/v2/projects/shared. Each Project returned in the response will contain the following attributes, which you can carry forward as your build your directory:
id(of the Project itself)team_idteam.account_id
Alternatively, you can make an affordance for "Shared Projects" simply by adding it as a "Team" on any chosen Account context. If you do choose to do that, it's helpful to the end user if you visually separate Shared Projects from true Team-scoped Projects, as the single Shared Projects list may include many different true Account and Team contexts under the hood.
3. Fetch the Team’s Projects
GET https://api.frame.io/v2/teams/{{team_id}}/projects
Next, make the above call and fetch all the Projects within the Team.
For each Project, you’ll want to grab:
idnameroot_asset_id- (optionally)
private, in case you want to differentiate for the user in your UI
As explained at the start of the article, root_asset_id is an important piece of Frame.io’s resource architecture, in that it allows you to navigate the file and folder directory within a Project.
Let's quickly recap what we've done so far: we’ve established the combined context of:
- Account
- Team
- Team Projects (and rootassetids)
- Shared Projects (and rootassetids) And that’s all we need to create or fetch Assets.
Listing folders and assets
4. Build the initial folder structure
GET https://api.frame.io/v2/assets/{{root_asset_id}}/children?type=folder
This will list out all the folders in a project, starting from the root_asset_id. If there are no folders, you’ll get back an empty list. If you want to include both files and folders (e.g. if your next step would be to GET an Asset from Frame.io, simply omit the query string parameter.
The other two filter options available for the type parameter are file and version_stack. All three filters are mutually exclusive, and an unfiltered call will return all three types mixed together.
5. Dig through the directory tree
For each folder that comes back, you’ll need to capture:
idname
As each folder is an Asset, your workflow for drilling through a folder structure will look like this:
-
GET https://api.frame.io/v2/assets/{{root_asset_id}}/children?type=folder- Render out the folder names in a list
- When a user clicks on a folder pass the folder’s id into the following query:
GET https://api.frame.io/v2/assets/{{folder_id}}/children?type=folder
6. Create and upload
Into a folder:
POST https://api.frame.io/v2/{{folder_id}}/children
Once you have the id of the folder you’d like to upload into, simply make a POST to its children, per the resource documentation and guide. This will create a placeholder Asset, and (depending on the method you choose), return:
- A
uuidintended for tracking use-cases - A list of upload_urls can use to PUT your file directly into Frame.io's backend data storage.
Into a Version Stack: Version Stacks present a similar workflow, with one added step covered in this guide, summarized below. The keys are remembering that a Version Stack is a container that looks like an Asset, but behaves like a folder; and that you have to upload your Asset first, and then stack it into your Version Stack as separate actions.
Accordingly, if you want to upload an Asset into a Version Stack, you’ll need:
- The Version Stack’s
id - The Version Stack’s
parent_id(e.g. its containing folder or Project root)
First, POST https://api.frame.io/v2/assets/{{parent_id}}/children to create your new Asset. Capture the new id in your response.
Now, you can use your new Asset’s id and POST https://api.frame.io/v2/assets/{{version_stack_id}}/version, with a body payload of:
{
  "next_asset_id": "<new-asset-id>"
}